Category: carpentry
-
unhinged
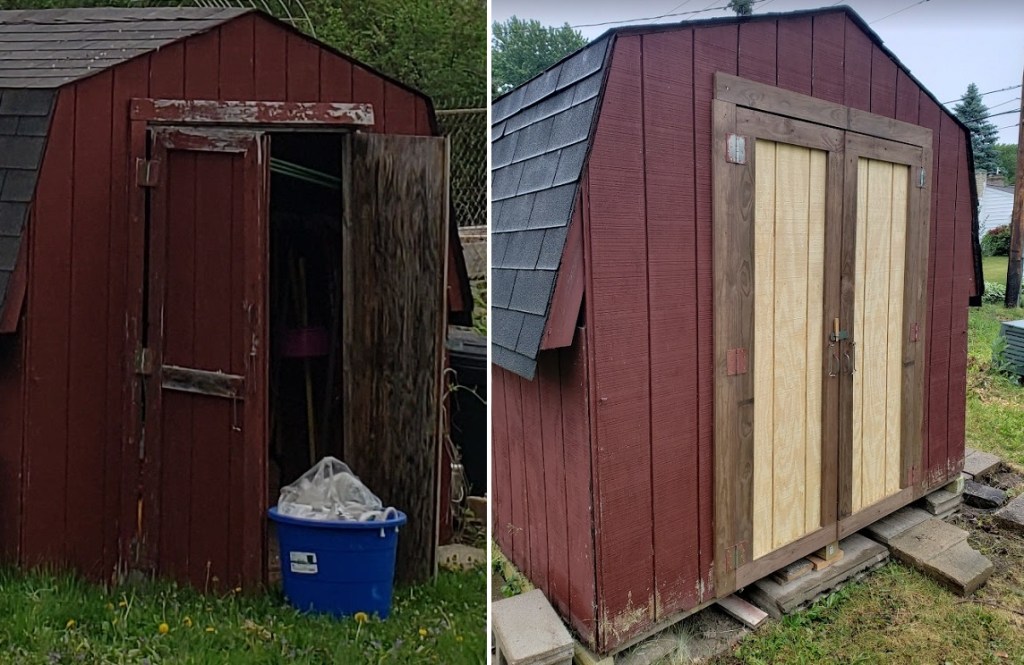
I spent yesterday morning and all afternoon tearing the old doors off the garden shed, then rebuilding and rehanging new doors, with a lot of help from My Darling B, who volunteered her time to go to the lumber yard with me and also to hang the doors. I wish I had a better “before”… Read.
-
foundation
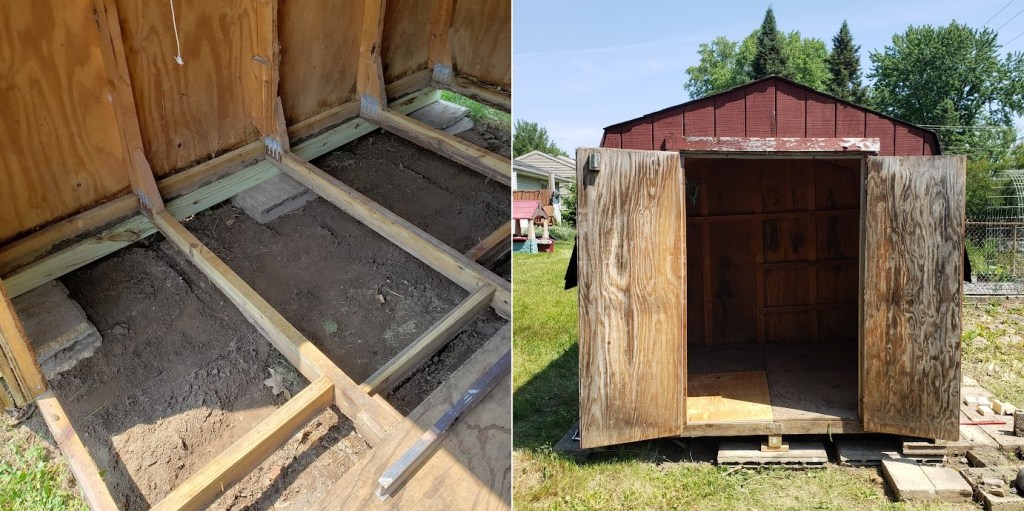
The shed is up on what I hope is a somewhat more secure foundation. There’s a heavy concrete block under each corner and in the middle of each side, and a thick piece of timber runs under frames along two of the outside walls and down the middle. I could have run timbers around all… Read.
-
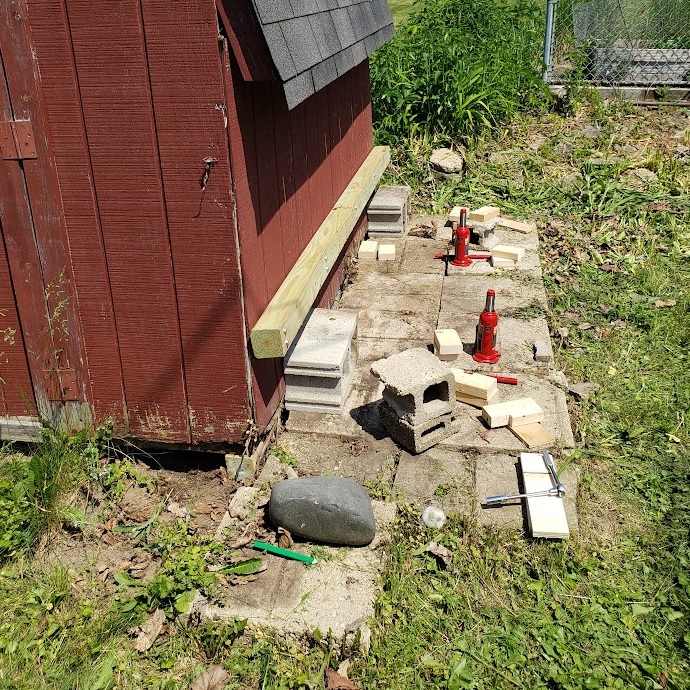
jacked
My Darling B needed a garden shed for all her shovels and rakes (and implements of destruction) so we bought a kit to make one from a local hardware store and I put it together in the back yard about fifteen years ago. When we bought it, I asked the guy at the hardware store… Read.
-
the camping thing – progress 5/6/23
Every day I try to do at least one thing to make continual progress getting The Camping Thing ready for the season. Some days it doesn’t seem like much, but on a day like today when I can see what the end product is going to look like, the feeling of satisfaction is pretty great.… Read.
-
progress – the camping thing – 043023
Ah yes, the now-familiar photo of a nondescript plywood box propped on sawhorses in a spectacularly filthy garage. How predictable am I? Today’s goal was to unship the battery box from its position in the back of the van where it was bolted down; give the outside front and back a quick but reasonably good… Read.
-
camping thing progress 4/29/23
It’s all little steps these days. I had just two goals yesterday after work: put the bottoms in the two boxes I built last week, and cut a lid for the battery box. They weren’t big goals, so it’s no big surprise I managed to reach them both. That’s how I keep projects moving: break… Read.
-
progress 4/23/23
It looks like it’s just photos of boxes, one after the other, but honestly I’m making real progress now. Five out of five boxes built; two completed (although I might slap another coat of poly on them); two nearly completed (slapped a coat of poly on them today & will attach the lids on hinges… Read.
-
progress 4/19/23
-
work at home
-
wired
Check this out: I froze my ass off to get that photo. I hope you appreciate that. It seems a little funny that you can put on a sweatshirt and long pants and go out in fifty degree weather and think, “Oh, this isn’t so bad,” and you get so into doing whatever it is… Read.

